Photographing models.

Photographing models.

Home Forums General Questions Photographing models.

Viewing 22 posts - 1 through 22 (of 22 total)
  • Author
    Posts
  • #24606
    Maurice Cox 1
    Participant
      @mauricecox1
      #244237
      Maurice Cox 1
      Participant
        @mauricecox1

        I have a question for the photographers out there. When taking a picture of a model or home made tool, I invariably find that, what to the naked eye looks like a nicely machined or polished piece of metal, appears in the photo to be covered in deep random scratches! It looks dreadful. Is it possible to mitigate this effect by changing the lighting, or perhaps a polarizing filter would help?

        Thanks, Maurice

        #244244
        Paul Barter
        Participant
          @paulbarter66156

          well that was disapointing

          #244246
          Phil P
          Participant
            @philp

            I think it might be the flash on the camera that is causing this effect.

            Try putting the camera on a tripod or some form of support, and use natural light instead of flash.

            Phil

            #244248
            NJH
            Participant
              @njh

              Do you have an example image you can post Maurice ?

              Norman

              #244251
              JasonB
              Moderator
                @jasonb

                I think a lot of the time we tend to take a photo of a small part and then look at it on our big screens, the marks are there all the time it's just that the larger size of the image makes even fine surfaces look like ploughed fields.

                #244253
                Neil Wyatt
                Moderator
                  @neilwyatt

                  when you use a point source a highlight will form on every corner, including those of any 'micro-scratches'. Use a diffused light source, if you have to use sharp light sources, try bouncing light onto the subject with white card.

                  I take 'quick' pictures on the kitchen worktop which means a long fluorescent, diffuse daylight from the window, and light from the LEDs at the far end. Modern digital cameras take care of the weird colour temperature!

                  For close ups, I have a 'mini-studio' with white, diffusing, sides and two LED spot lamps (they did have halogens in them) that are large enough in comparison to small subjects not to make harsh shadows or sharp highlights.

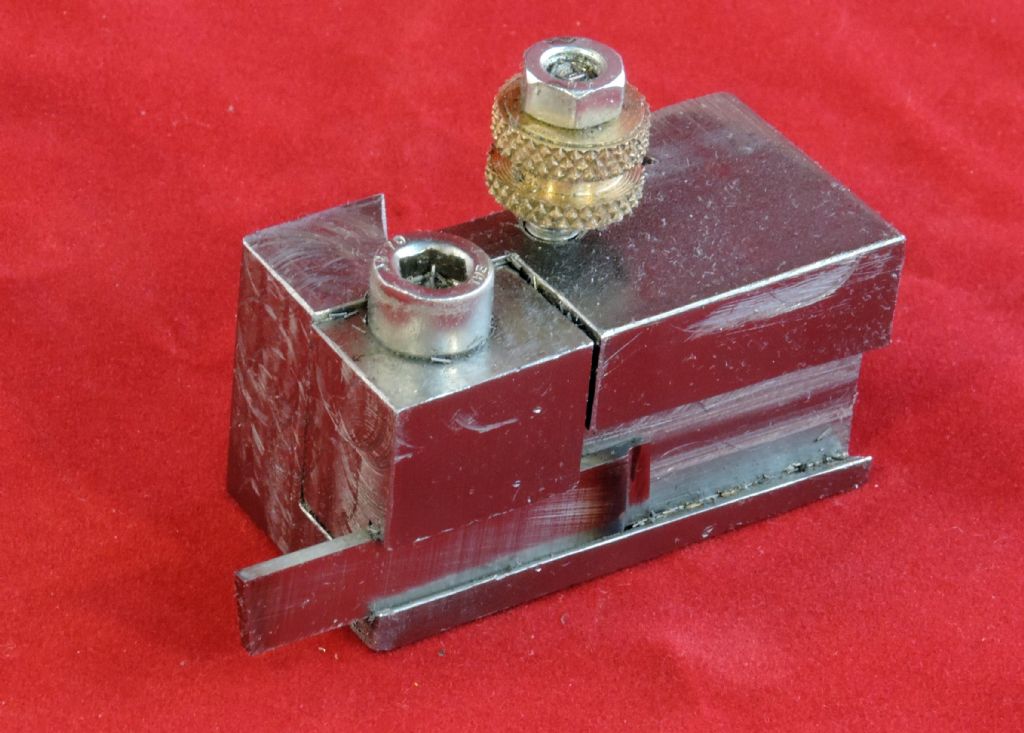
                  Here's an unexciting photo of a tool block aimed to be practical rather than pretty, so it shows lots of machining marks (and swarf). But see how the diffuse light sources don't exaggerate the marks – if this was a flash photo it would look even worse!

                  8 (26).jpg

                  #244259
                  Michael Gilligan
                  Participant
                    @michaelgilligan61133

                    Maurice,

                    The polarising filter is unlikely to be much help, because reflections from metallic surfaces do not change the polarisation of the light.

                    Neil is on the right lines, but the classic solution to the problem is a 'light tent' …. This can be anything from a rolled tube of tracing paper, through to an opal Perspex sphere [use your initiative, and maybe visit the lighting department at IKEA]. Put the subject inside, shine the light at it from outside, photograph through a suitable hole.

                    MichaelG.

                    #244261
                    Ajohnw
                    Participant
                      @ajohnw51620

                      For shots I am just going to post I always used flash so that I can hand hold the camera. As I see it this means that I need to think about where the reflections will be. As an example. ( For JS just to show I do make things – no polishing on this either )
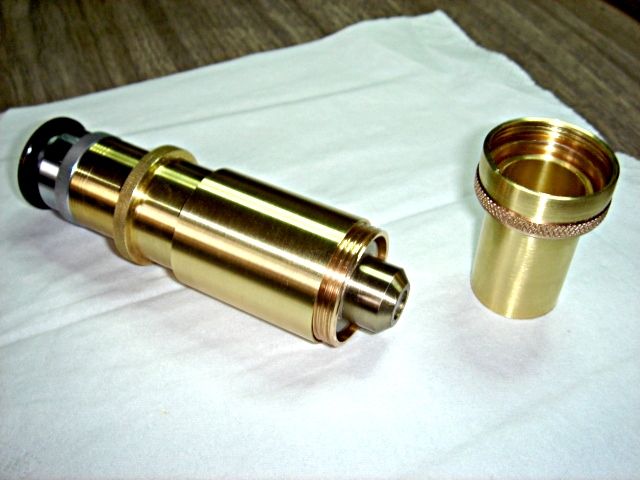
                      centringtelescope2.jpg

                      There are 2 reflections. From a strip light and the one from the flash. Neither go directly back into the camera. This can help prevent marks from being ultra prominent as well.

                      It needs diffuse shadow free lighting to do any better. Light boxes can be bought that help with this as per Neil but the easiest answer is to take it outside and set up out of direct sun light.

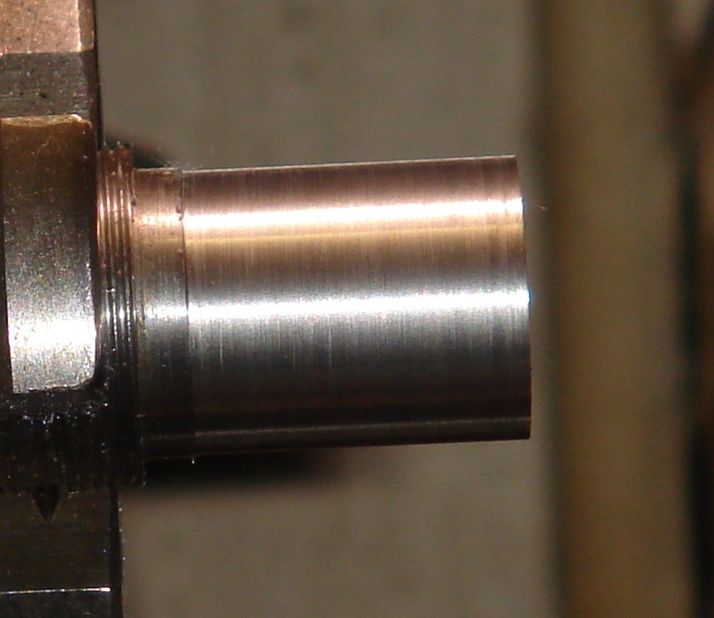
                      This one shows just how much light that isn't diffuse can augment detail.

                      siversteeldrylathewarmedup.jpg

                      There's detail in that which will be under a micron deep and it's doubtful if any of it is much over that. One reflection is from a strip light and the other from a led lamp. One of the Ikea flexible stem ones.

                      The other problem I have had at times is very light oil films and fluorescent lighting causing a certain amount of colour. indecision I've also found recently that some strip lights approved for viewing photo's doesn't blend well with flash.

                      John

                      #244269
                      Clive Hartland
                      Participant
                        @clivehartland94829

                        If I might add something here, to knock the shine off an object place it in a fridge for a while and as you take it out it will get condensation on it which takes away the highlights.

                        Make yourself a light box, very simple and easy. Get a cardboard box and then crumple up some baking foil and open out again and stick to the inner surfaces of the box.

                        This sets up a reflection surface that has no highlights. It reflects daylight pretty well too. Other lighting can be added to illuminate from the sides and top if need be.

                        Clive

                        #244279
                        Maurice Cox 1
                        Participant
                          @mauricecox1

                          Thanks for the advice gents; sorry if my question was too boring for Mr. Barter. I don,t use the camera flash for the pictures, just artificial light. It sounds like diffused light is the way to go. I have something suitable to achieve that. I shall experiment.

                          Regards Maurice

                          #244280
                          Bob Rodgerson
                          Participant
                            @bobrodgerson97362

                            Maurice,

                            whatever you do don't put Photographing Models into a search engine. You might end up with more than you bargained for.

                            #244282
                            Nick_G
                            Participant
                              @nick_g
                              Posted by Bob Rodgerson on 26/06/2016 22:12:02:

                              Maurice,

                              whatever you do don't put Photographing Models into a search engine. You might end up with more than you bargained for.

                              .

                              Reminds me of my son when aged about 10 wanted to check his Microsoft hotmail account.

                              Except he typed in 'hotmale' ……………. He (thankfully) was horrified with what returned while I and everyone else rolled with laughter at the poor lad. laugh

                              Nick

                              #244524
                              Howard Lewis
                              Participant
                                @howardlewis46836

                                Another tip to prevent unwanted reflections, was to rub the surface with plasticine. The film that it leaves behind is virtually non reflective, but can be polished off , afterwards, with a cloth.

                                This applies to machined/mechanical models. Some other kinds of models may not take too kindly to being rubbed with odd substances!

                                Howard

                                #244526
                                Vic
                                Participant
                                  @vic

                                  I've found the best lighting is outside on an overcast day.

                                  #244538
                                  Nick_G
                                  Participant
                                    @nick_g

                                    .

                                    In the commercial world there are aerosol sprays that give a flat or satin finish to the item being photographed that can be cleaned off at a later date. These are however quite expensive.

                                    A substitute is a dusting over with hairspray.

                                    Nick

                                    #244551
                                    SillyOldDuffer
                                    Moderator
                                      @sillyoldduffer

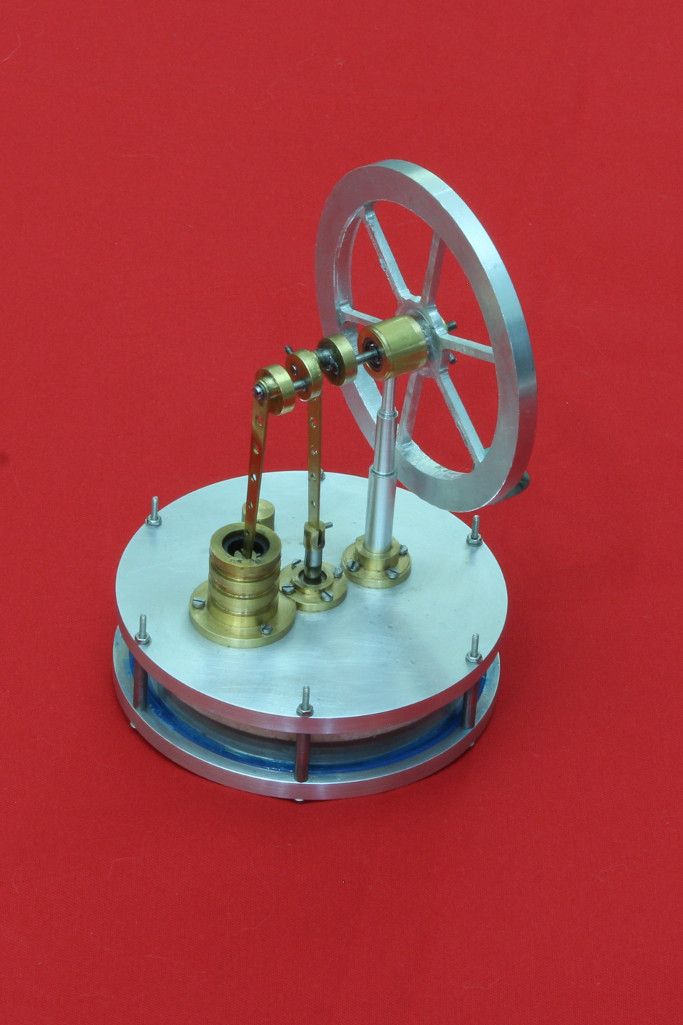
                                      Here's a variation I'm struggling with at the moment. I'm trying to photograph a shiny object and then separate it from the background. It's the "Green Screen" technique, except I'm using red because the model has some green in it. The tool is gimp, not used skillfully in this example.

                                      redbackground.jpg

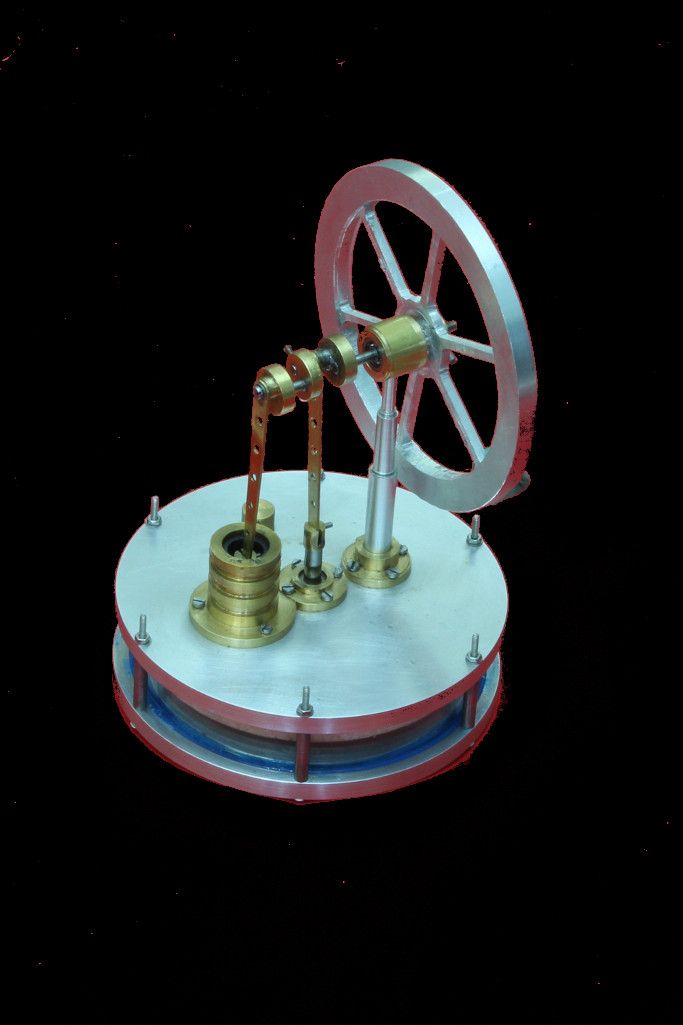
                                      Looks like it works, except for the unnatural red reflections that become obvious as soon as I select by colour and then delete the red background. My replacement background happens to be black but you get the unwanted effect with other backgrounds too.

                                      removed.jpg

                                      The picture is a long exposure aperture priority lit by light bounced off the ceiling. Good news, you can't see the scratches. Bad news, it looks as if it's red-hot!

                                      Has anyone any suggestions about how to get rid of the red reflections? I'm going to try making a light box next unless someone saves me with a good idea.

                                      Sorry about the size of the photos.

                                      Thanks,

                                      Dave

                                      #244555
                                      Michael Gilligan
                                      Participant
                                        @michaelgilligan61133

                                        Dave,

                                        I'm in the early days of experimenting with Green [etc.] screen, but I understand that you need to light the subject and the screen separately. … Which means a bigger 'set' than one might have hoped sad

                                        Found a good video the other day … B&H

                                        MichaelG.

                                        .

                                        Edit: [for still photography] here is a different approach.

                                        Edited By Michael Gilligan on 28/06/2016 20:59:47

                                        #244559
                                        Neil Wyatt
                                        Moderator
                                          @neilwyatt

                                          In photo-paint & photoshop you can adjust the tolerance by hue, brightness and colour.

                                          paintbucket fill is a bit of a blunt instrument.

                                          Best way is to select a mask by colour rather than use the paint bucket. Tidy up by using subtract or add mask, then make sure anti-alias is switched on. Now clear to paper colour or fill it. You may need to expand or contract tyeh mask by a pixel or two or feather it to get the best results.

                                          Our retouchers usually just go straight in with the freehand mask tool as ME contributors rarely do us the favour of a mono-colour background!

                                          Neil

                                          #244560
                                          Vic
                                          Participant
                                            @vic

                                            I've not got one but I've seen good results from others that have used light tents. Many come with a variety of different coloured backgrounds.

                                            #244577
                                            Ajohnw
                                            Participant
                                              @ajohnw51620

                                              There's so much variation in the density of the red Dave I think you'll find it much quicker to do it again. This time on a white background. A few sheets of printer paper should do. Black should be ok too.

                                              If you want to change the background then try GIMP's foreground select. Once that's right invert the selection and bucket fill with what ever you like. It's a plugin and could be used to select the background as well really. Depends on which is easiest.

                                              This is one I did using the plugin

                                              DianthusOnBlackWone
                                              John

                                              #244578
                                              Ed Duffner
                                              Participant
                                                @edduffner79357

                                                Another Gimp option is the Color to Alpha function, info: LINK

                                                Also in Gimp you could,

                                                – Load the picture.
                                                – Select the red channel in the Channels tool window, click on th eye to make the red channel invisible.
                                                – Press ALT-PrintScreen key combination on the main picture window to copy the photo to the clip-board.
                                                – Choose File/New and paste the clipboard content into the new image, then save.

                                                Ed.

                                              Viewing 22 posts - 1 through 22 (of 22 total)
                                              • Please log in to reply to this topic. Registering is free and easy using the links on the menu at the top of this page.

                                              Latest Replies

                                              Home Forums General Questions Topics

                                              Viewing 25 topics - 1 through 25 (of 25 total)
                                              Viewing 25 topics - 1 through 25 (of 25 total)

                                              View full reply list.