Moving warco gh universal into workshop

Advert

Moving warco gh universal into workshop

Home Forums Manual machine tools Moving warco gh universal into workshop

Viewing 16 posts - 26 through 41 (of 41 total)
  • Author
    Posts
  • #534844
    Jak2g
    Participant
      @jak2g
      Posted by HOWARDT on 19/03/2021 09:51:46:

      The gib once loosened should simply slide out. Make sure you have loosened the gib lock screws.

      Thats what I thought. I'm not missing something am I- the gib lock screws are the two plastic black levers, you can see one in the photo top middle – these have need completely backed off and one entirely removed…

      Advert
      #534851
      Grindstone Cowboy
      Participant
        @grindstonecowboy

        Never seen a taper gib in the flesh, but I think the two lever headed screws you have removed / loosened are just locks – there will be adjustment screws at each end of the gib (parallel to the length of it) that will also need removing so the gib can be taken out (pushing from the thin end) and then you should be able to remove the table.

        Rob

        #534852
        Stuart Smith 5
        Participant
          @stuartsmith5

          I don’t know if this is the same on your machine, but I have a smaller Warco mill – the WM16.

          I bought it secondhand and dismantled it to move it, but removed the complete x/ y table by winding it forwards. I had to remove the lead screw nut from under the table . It was held in place by 2 screws, accessed from the back.

          I found a manual with diagrams on the Grizzly website and I have found one which might be like yours. **LINK**

          It has a parts list and diagrams on page 48 and it shows the lead screw nuts.


          Stuart

          Edited By Stuart Smith 5 on 19/03/2021 10:36:36

          #534855
          Dr. MC Black
          Participant
            @dr-mcblack73214

            This might be a naive question but have you rung Warco and asked for advice?

            MC

            #534857
            Jak2g
            Participant
              @jak2g

              Thank you everyone. I think its something to do with the taper gib. Never worked with one before. My sx2p was different. I don't think I've taken into account the importance of the screw on the left and right sides where the gib straps end.

              #534915
              Gerhard Novak
              Participant
                @gerhardnovak66893

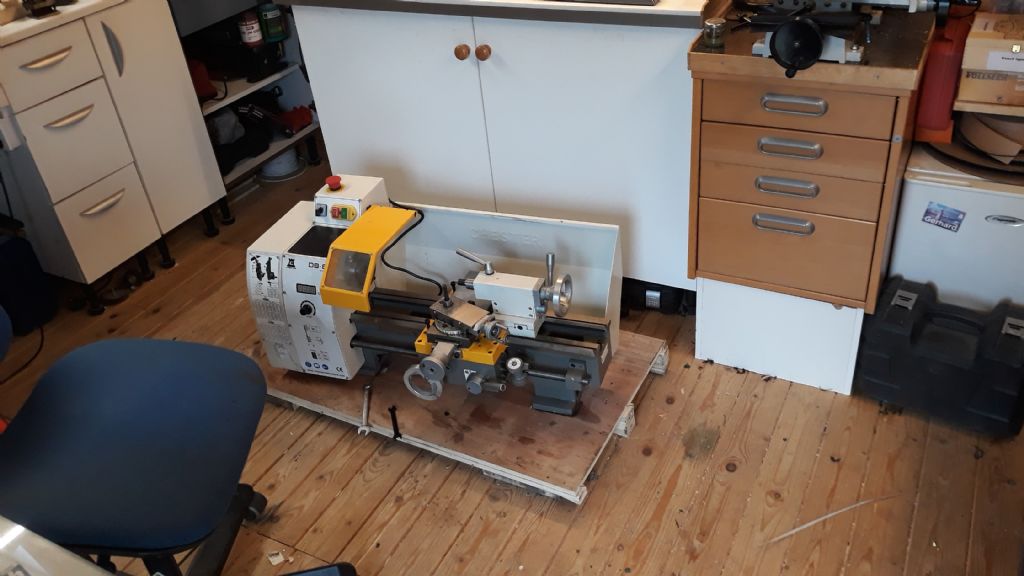
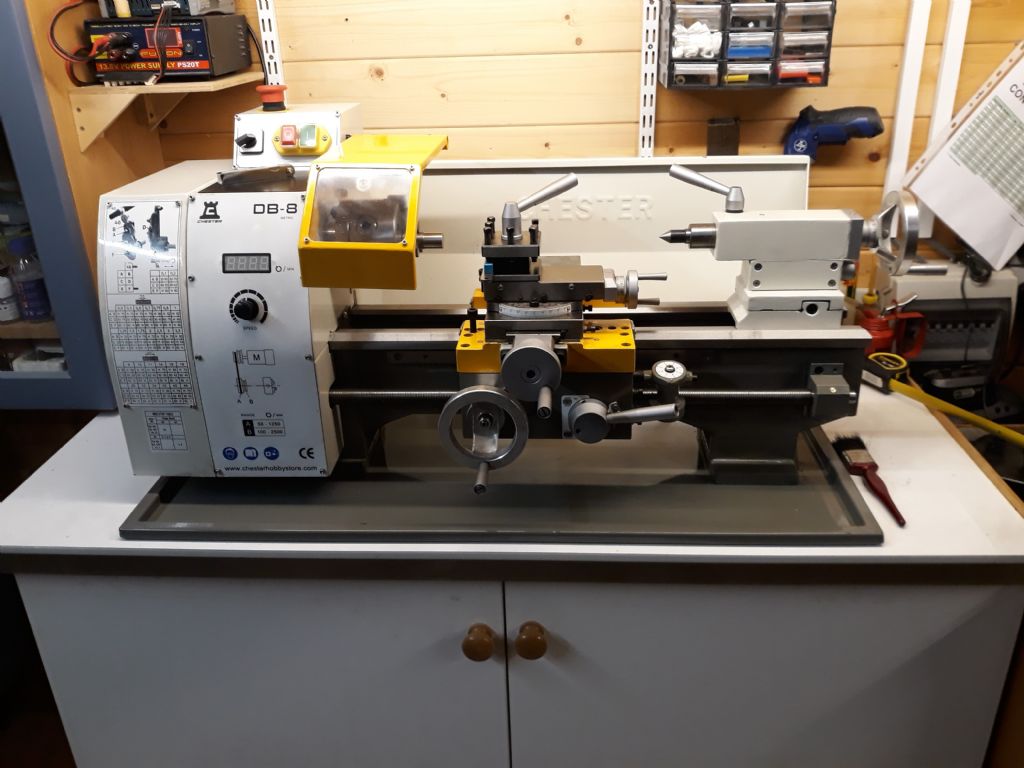
                Well 320 kg is a challenge. I recived yesterday my DB8VS, I have the advantage of a stepless garden path to my shed and could convince the driver to move the box on his pallet trolley down the garden. So step one was easily done. Step 2 was a bit harder. I removed everything heavy like chuck and tailstock and then it was muscle power. My son and I grabbed the machine and lifted it up to the workbench. After my weight removal action it had probably 100kg. Felt heavy enough for me even I was on the light side (tailstock side).

                DB8 on the floor before weight removal actions
                img-20210318-wa0002 (2).jpeg

                and finally reasonable cleaned and screwed on in its final position.

                20210318_213217 (2).jpg

                #534920
                JasonB
                Moderator
                  @jasonb

                  just read your post again whey you said you had removed the adjusters, these are infact the locks the locks. The taper gib is adjusted by the screws at either end of the table one pushes it in to tighten the other pushes it out to loosen. Take them both out and use a brass drift as I mentioned from what you will be able to see is the narrow end.

                  #534933
                  Jak2g
                  Participant
                    @jak2g
                    Posted by JasonB on 19/03/2021 17:22:28:

                    just read your post again whey you said you had removed the adjusters, these are infact the locks the locks. The taper gib is adjusted by the screws at either end of the table one pushes it in to tighten the other pushes it out to loosen. Take them both out and use a brass drift as I mentioned from what you will be able to see is the narrow end.

                    You hit the proverbial nail on the head. I loosened those out completely, and saw (because of your post) that one end of the gib string is narrower. A slight tap and it began to slide out.

                    Everything is off now, save for the column. Of all the tools I own, I didnt have a large enough hex key for the screws. Attempted with vice grips, that worked for 3 but the fourth ain't giving in. Amazon to the rescue. We'll hopefully have it off my drive for tomorrow.

                    Thank you all, again, for the help.

                    #534950
                    Dr. MC Black
                    Participant
                      @dr-mcblack73214

                      What size Hex Key?

                      Where do you live? I have all sorts of large Hex and Allen Keys

                      MC

                      #534990
                      Jak2g
                      Participant
                        @jak2g
                        Posted by MC Black on 19/03/2021 20:40:21:

                        What size Hex Key?

                        Where do you live? I have all sorts of large Hex and Allen Keys

                        MC

                        Hello sir

                        I'm in Leeds but luckily have found a reasonably priced kit which should be arriving today! The offer is much appreciated though!

                        #535050
                        Howard Lewis
                        Participant
                          @howardlewis46836

                          You can't have too many Allen keys, Imperial or Metric!

                          Sometimes having two the same size is a big advantage, and makes life a lot simpler.

                          At some time, one of the "spares" will need to be modified for a job. (I have one with a shortened short end, in a length of bar to give access and sufficient leverage to tighten the four capscrews for the worm housing on the Apron of the lathe. No room for fingers or to see what is happening; work by feel, a flat at a time )

                          Howard

                          #535300
                          Jak2g
                          Participant
                            @jak2g

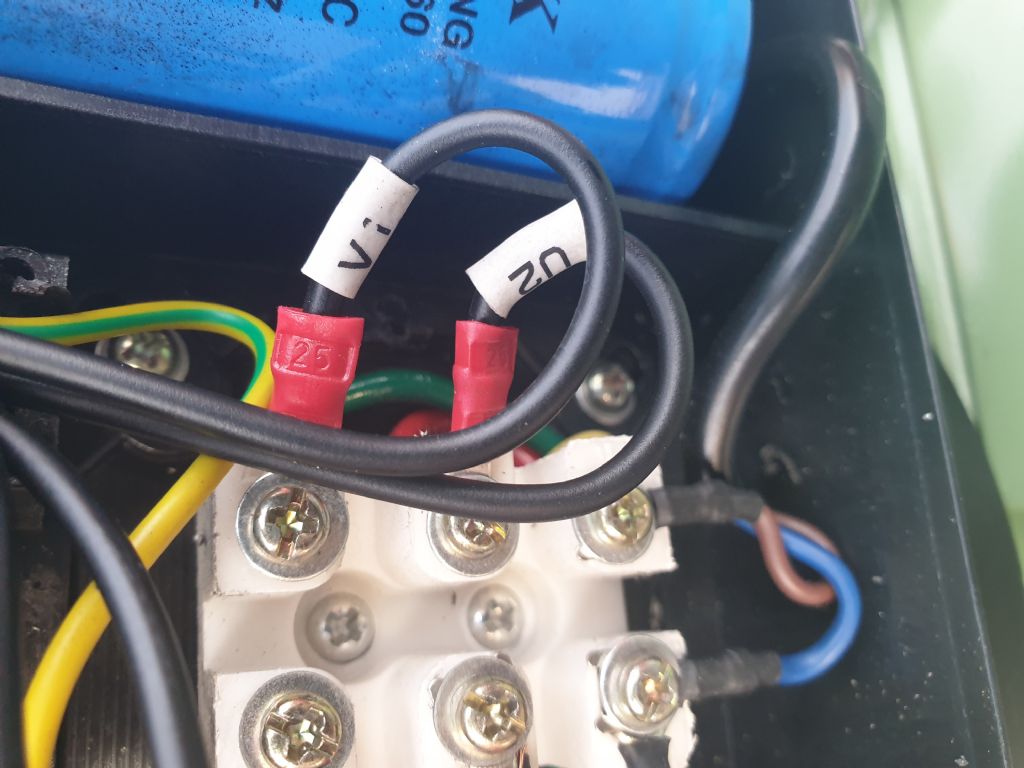
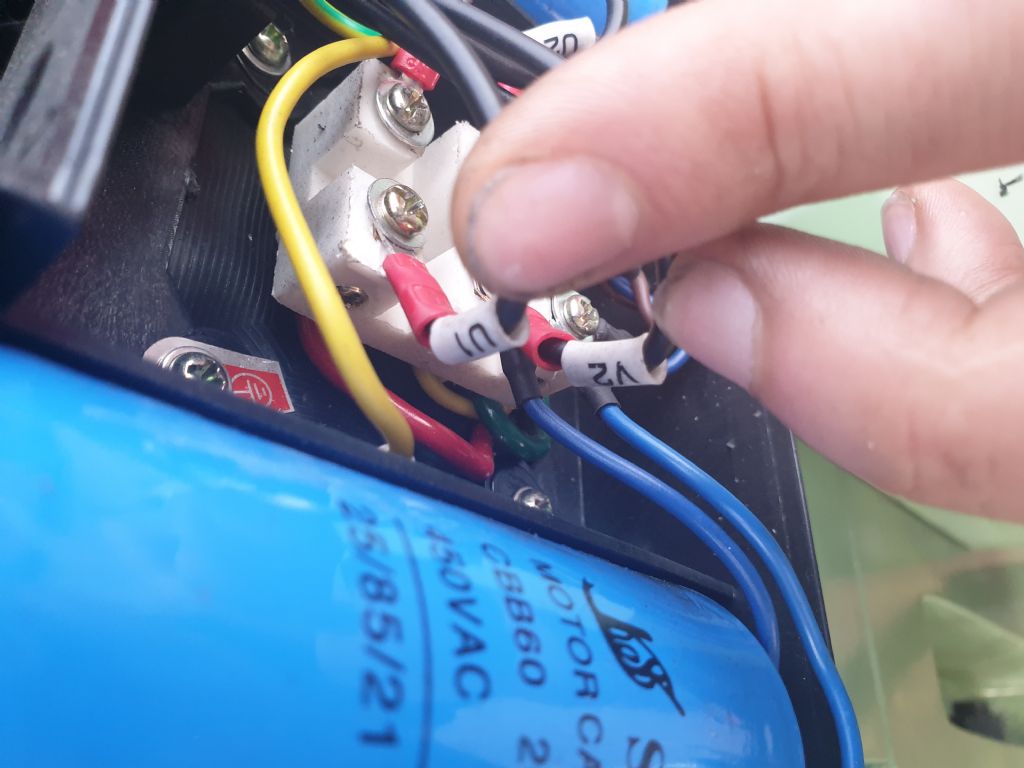
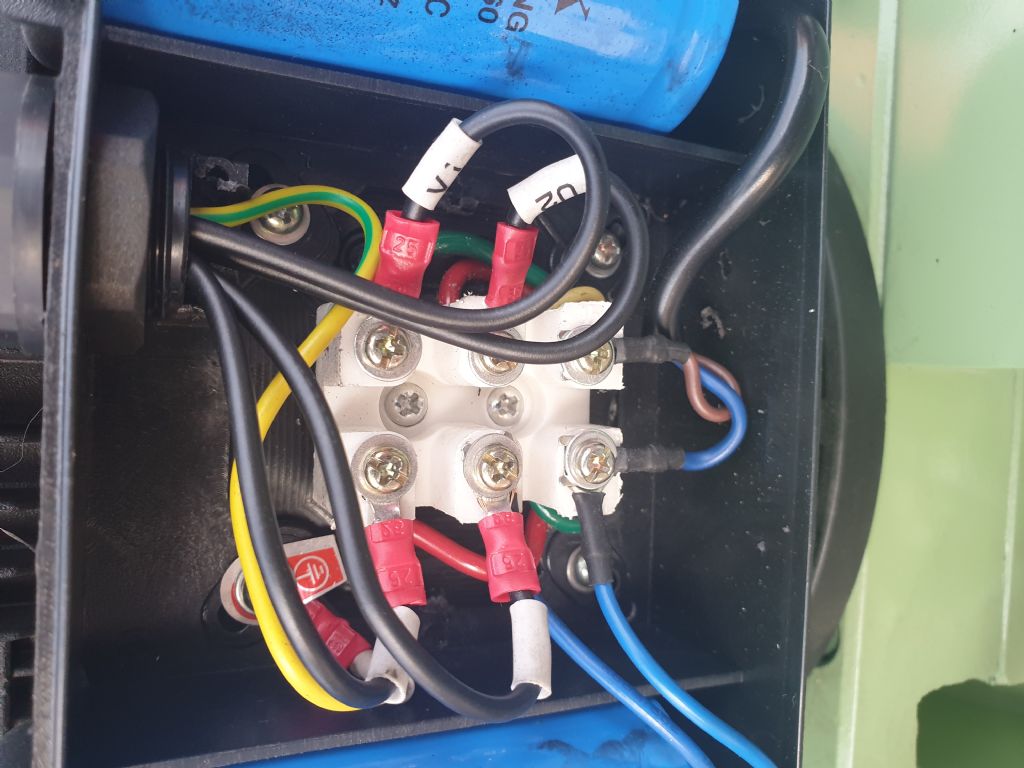
                            20210318_174324.jpgAlas, its in situ but DOES NOT RUN. the green power light is on, but when I hit forward or reverse it does nothing. The only thing I can think is that the motor is wired wrong, but I rewired it according to the photos I took before dismantling so unless it was wired wrong to start with, then it shouldn't be that. Heres some photos and across them you can see the wire names. These were taken before disassembly. Any ideas? I'm very very disappointed after cleaning it all down and assembling it after all that graft to get it to the shop.

                            just to confirm – top left = U1, top right = V1, bottom left = V2, bottom right = U2. V2 is also has another wire on it, a blue one. 20210318_174345.jpg20210318_174304.jpg

                            #535307
                            JasonB
                            Moderator
                              @jasonb

                              Have you got the guards/covers etc back in place as they have interlocks which will stop the machine running.

                              Always best to test run a macine before you take it apart then you and th esupplier know where you stand.

                              #535308
                              Swarf Maker
                              Participant
                                @swarfmaker85383

                                Remember that the chuck guard must be down and operating its safety switch. Gear/belt cover also needs to be in place?

                                #535311
                                Jak2g
                                Participant
                                  @jak2g

                                  I didnt realise there was a safety switch on the chuck guard…..let's hope that is it. I'm gonna go check right blooming now.

                                  #535315
                                  Jak2g
                                  Participant
                                    @jak2g

                                    Hallelujah!! Flipped the guard hinge and it worked!! Relief!!

                                    And, yes, it is always a good idea to check machines when they arrive.. that was a silly oversight due to eagerness.

                                  Viewing 16 posts - 26 through 41 (of 41 total)
                                  • Please log in to reply to this topic. Registering is free and easy using the links on the menu at the top of this page.

                                  Advert

                                  Latest Replies

                                  Home Forums Manual machine tools Topics

                                  Viewing 25 topics - 1 through 25 (of 25 total)
                                  Viewing 25 topics - 1 through 25 (of 25 total)

                                  View full reply list.

                                  Advert

                                  Newsletter Sign-up