Swaging, crimping and peening

Advert

Swaging, crimping and peening

Home Forums General Questions Swaging, crimping and peening

Viewing 25 posts - 26 through 50 (of 54 total)
  • Author
    Posts
  • #315497
    SillyOldDuffer
    Moderator
      @sillyoldduffer

      I tried again yesterday with an annealed boss. Slightly more successful but still a failure. Also, the whole softened brass boss deformed under pressure, not just the flange. I will try lengthening and undercutting the 'to be swaged' part of the boss though I doubt it will make enough difference.

      As Jeff reveals in his educated post, this job isn't as easy as I thought. My plain punch and brute force approach didn't work! However, I was able to move the metal enough to suggest that a combination of angled punch as per Jeff plus a thinner swage section might work. (In the hope the job can be done in an ordinary home-workshop.)

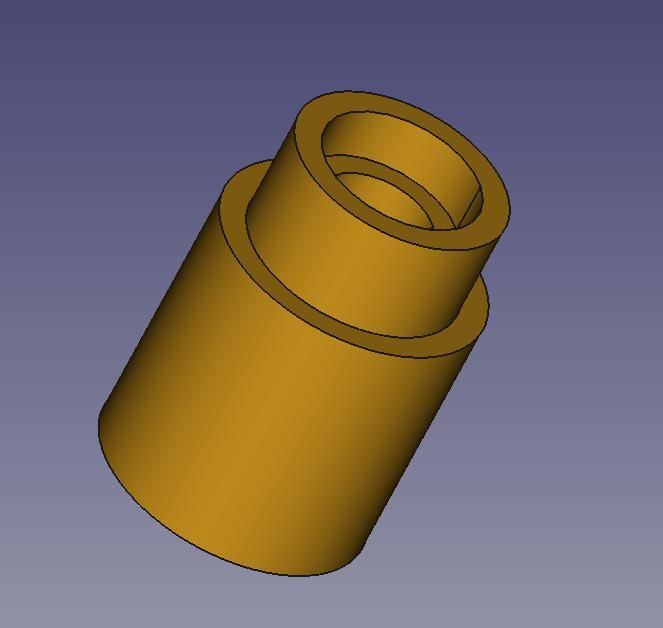
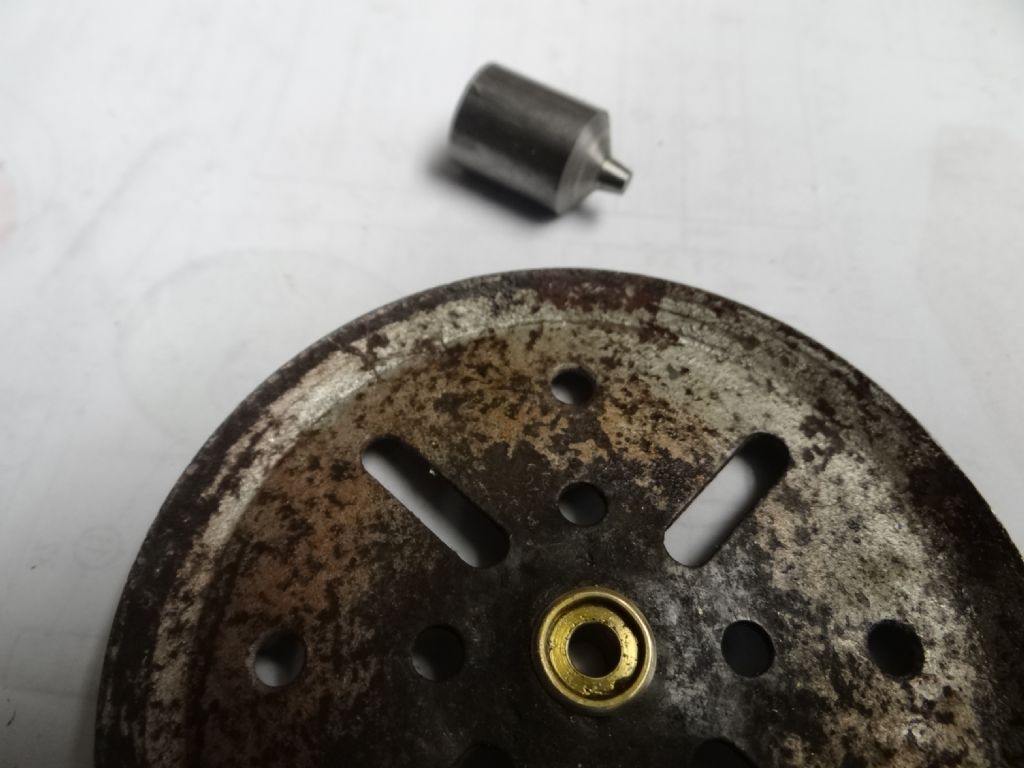
      The boss might be counter-sunk like this:

      boss.jpg

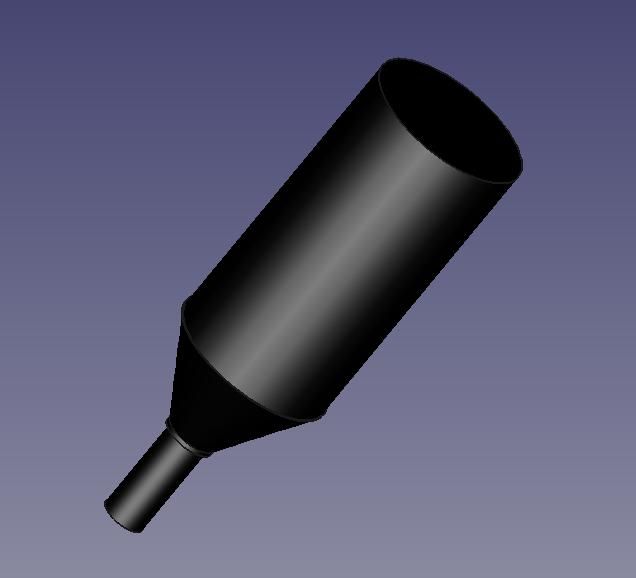
      And the starting punch shaped like this:

      punch.jpg

      The tapered punch would be used to start the swage, and a plain punch used to crimp it down to finish. Pesky domestic commitments mean I won't be able to try until tomorrow.

      Dave

      Advert
      #315502
      Muzzer
      Participant
        @muzzer

        That latest boss looks a bit more realistic. You should make the thin section as thin as possible, consistent with being strong enough (it's only a toy? Sorry!). If using a manual process, rather than a 2 stage tool starting with that conical punch, I'd expect a single tool with more of an annular section (semi circular in section), so that the thin section is bent back onto the flat surface of the gear, rather like a hollow rivet.

        I suspect the material may be a ductile flavour of brass. Often you will select a specific alloy to suit the production process for a particular part. Having said that I have very little experience of brass myself.

        We use those loads of those orbital riveters to rivet push rods onto pistons used in automotive pneumatic actuators in very high volumes. They are very quick, consistent and reliable but obviously quite expensive. Been around for decades or longer.

        Murray

        #315506
        Chris Taylor 3
        Participant
          @christaylor3

          My posting title should have been "swaging, crimping, peening, staking and orbital rivetting"! I'm on holiday at the moment just thinking about my next project, little did I expect the extent of the knowledgable response, Meccano may only be a toy, but it gave many of us our first taste of engineering principles, Alec Issigonis famously asked for an Outfit No 10 as a retirement present. The larger rotating parts may not need to transmit heavy loads but they need to be rigid and concentric and fixed firmly to the boss. I am hoping that there is a way of making this type of fixing in a home workshop, and the way things are going, the problem will be solved for me before I even get home…

          #315510
          Clive Hartland
          Participant
            @clivehartland94829

            I would be more inclined to try and get some, 'Cartridge' brass as it is more ductile and would not need annealing. My thoughts are that Meccano actually rolled the edge of the boss over to sandwich the pulley.

            Clive

            #315512
            Michael Gilligan
            Participant
              @michaelgilligan61133

              Chris,

              I'm not really bothered … just curious:

              Did you try Laurie Penman's rotary-swaging-in-the-lathe idea ?

              MichaelG.

              #315574
              Chris Taylor 3
              Participant
                @christaylor3

                Michael, apologies if I'm being dense, where would I find that? (I am fairly new to this forum) Chris

                #315576
                SillyOldDuffer
                Moderator
                  @sillyoldduffer

                  Got home early despite the road to the village being closed and had a quick play.

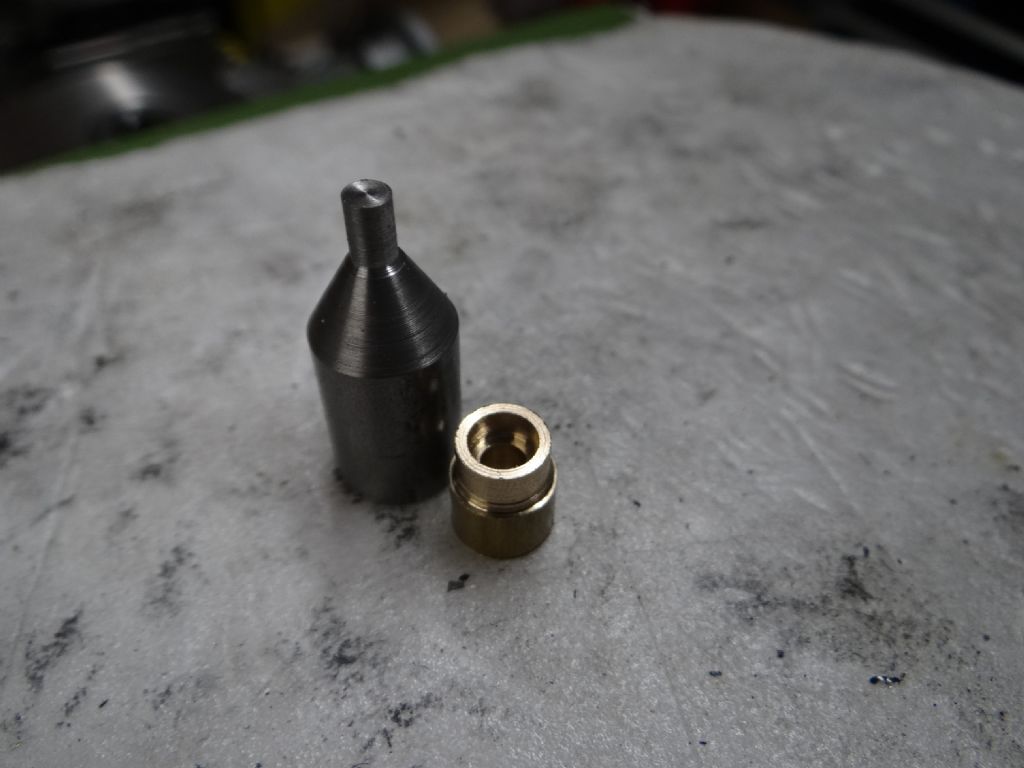
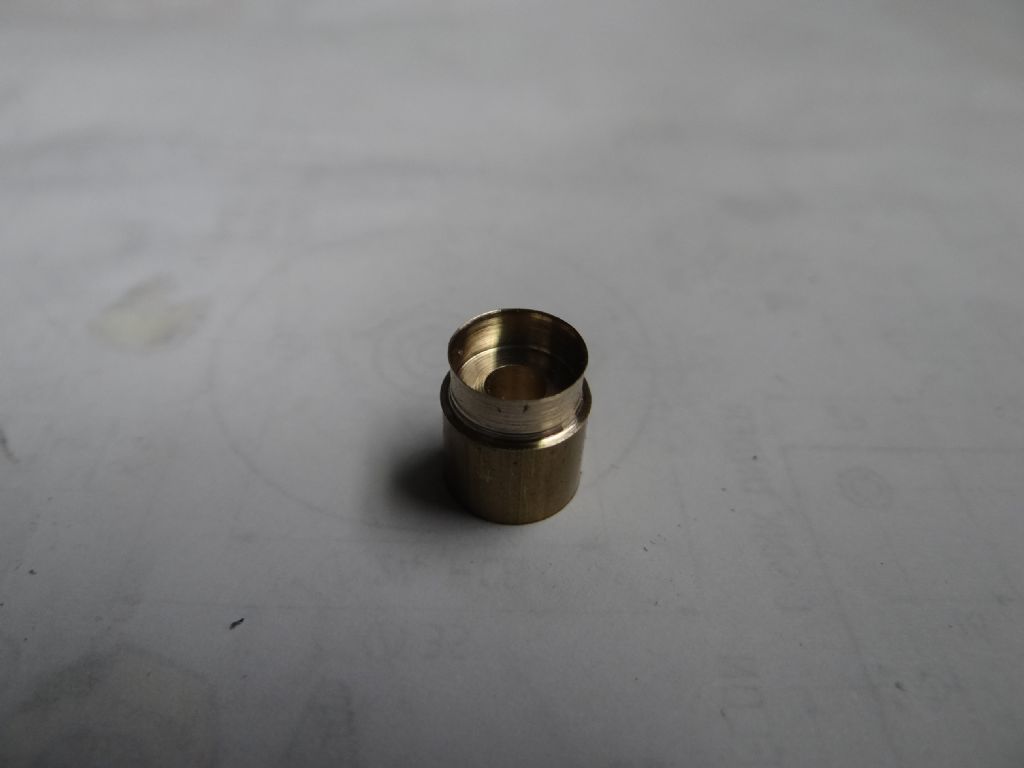
                  Made these:

                  dsc04557.jpg

                  Didn't bother annealing the brass before giving them a squeeze:

                  dsc04559.jpg

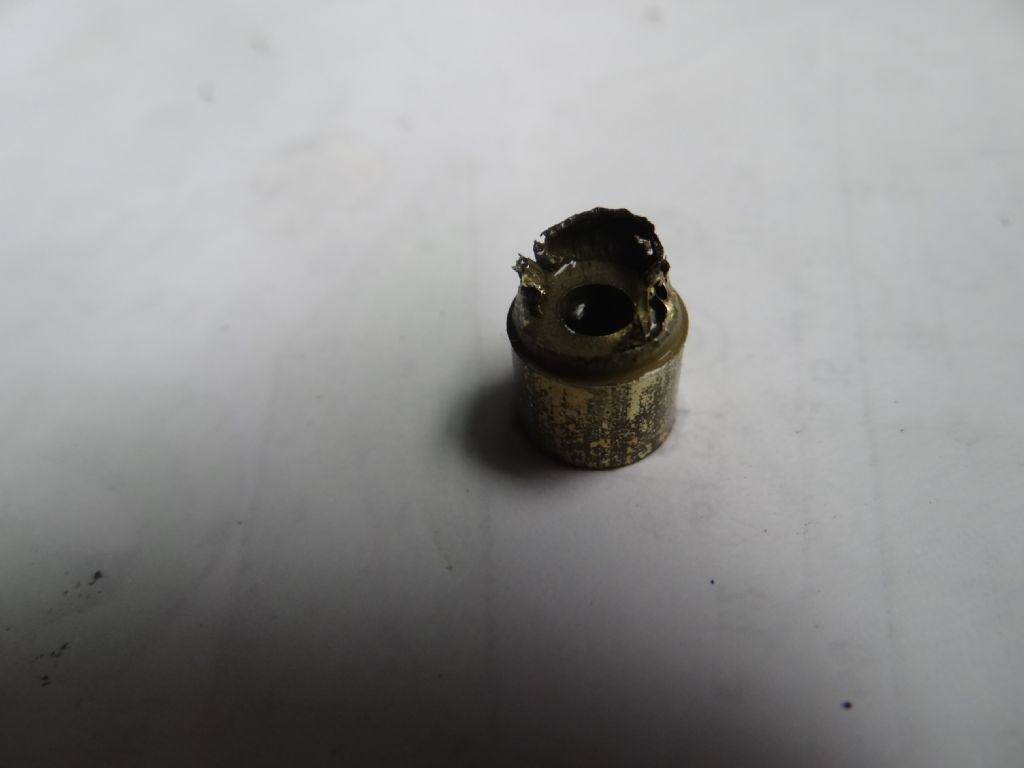
                  I'm using 3/8" brass rod and have no idea what the specification is. It's quite hard. Bit blurred but the brass has started to split. I knew Clive and Muzzer's advice about ductile brass would be good, and now I've proved it! After more squeezing a vice, bits start falling off:

                  dsc04561.jpg

                  Despite the brittle failure I think the result is promising. Next I shall try annealing the thin cup end of the boss and see if I can get an undamaged swage from softened brass.

                  Dave

                  #315577
                  John Reese
                  Participant
                    @johnreese12848

                    If you make the punch similar to that used for setting tubular rivets I think you will have better luck. Tubular rivets were used to attach brake linings. If you can find someone who had one of the rivet setting tools you could examine you could copy the contour. Reducing the wall thickness as you have done is an excellent idea. Ductile material is also a necessity.

                    I have a tool for setting brake rivets. I will try to measure the contour and make a sketch for you.

                    #315585
                    John Reese
                    Participant
                      @johnreese12848

                      If you make the punch similar to that used for setting tubular rivets I think you will have better luck. Tubular rivets were used to attach brake linings. If you can find someone who had one of the rivet setting tools you could examine you could copy the contour. Reducing the wall thickness as you have done is an excellent idea. Ductile material is also a necessity.

                      I have a tool for setting brake rivets. I will try to measure the contour and make a sketch for you. You can scale it up for your application.

                      #315646
                      Michael Gilligan
                      Participant
                        @michaelgilligan61133
                        Posted by Chris Taylor 3 on 06/09/2017 17:35:50:

                        Michael, apologies if I'm being dense, where would I find that? (I am fairly new to this forum) Chris

                        .

                        Chris,

                        I posted this on 05-Sept.

                        ___________________

                        Chris,

                        If you want to reproduce the visual detail of the Meccano fixing, without the specialist machinery that Tim mentioned … have a look at Figure 9 in Laurie Penman's article here: **LINK**

                        http://www.awci.com/wp-content/uploads/ht/March2012.pdf

                        ___________________

                        .

                        I think It's worth a look … Using the jaws of the drill-chuck is perhaps questionable, but the principle is sound.

                        MichaelG.

                        #315663
                        John Reese
                        Participant
                          @johnreese12848

                          I have not been able to get to my shop to measure up the rivet set for tubular rivets. Here are some images that might help.

                          http://www.bing.com/images/search?q=setting+tools+for+tubular+rivets&qpvt=setting+tools+for+tubulr+rivets

                          #315664
                          John Reese
                          Participant
                            @johnreese12848

                            This seems to be the clearest image of the bunch. Image result for setting tools for tubular rivets

                            It first spreads the end of the tube. Then it turns the flared end outward. Finally it turns the edge down.

                            #315690
                            SillyOldDuffer
                            Moderator
                              @sillyoldduffer

                              Thanks John for the tubular rivet picture, that shape makes a lot of sense. I'll have a go, but don't bet the farm on me making a good facsimile. It will be another first for me.

                              Michael, I read Laurie Penman's article and intend trying his approach too. (How on earth did you find the article? Talk about buried treasure, you must be the Indiana Jones of web research.) I'm not sure about using the end of a drill chuck directly as a swage and will probably turn something to protect the chuck. I know chuck jaws are hardened but even so. Perhaps horologists use a particularly ductile brass for that sort of work?

                              A quick internet search for Cartridge Brass was disappointing. I could only find it as used ammunition. I suppose it could be melted down but not in my workshop.

                              Ta,

                              Dave

                              #315698
                              Keith Rogers 2
                              Participant
                                @keithrogers2

                                Use CZ131 Brass for making rivets. Free machining brass with some ductility.

                                Somewhere I have a drawing with the dimensions for the correct form of the tool for swaging tubular rivets of

                                various sizes. If I can find it I'll scan it and try and post it on here.dont know

                                Keith.

                                #315703
                                Clive Hartland
                                Participant
                                  @clivehartland94829

                                  Cartridge brass as follows, CZ106 and CuZn 30. Cold forming excellent

                                  Clive

                                  #315707
                                  MW
                                  Participant
                                    @mw27036

                                    I think brass is similar to copper(being a copper alloy ofc) in that it work hardens so you may get even better results by annealing after each successive stage of working, rather than just annealing once.

                                    But the best stuff will probably be the cartridge brass, provided you can get it, but theres a little tip if you can't.

                                    Might be worth looking into what hot brass pressings are, as well. 

                                    Michael W

                                    Edited By Michael-w on 07/09/2017 11:48:07

                                    #315709
                                    Keith Rogers 2
                                    Participant
                                      @keithrogers2

                                      My Smiths catalogue lists CZ106 as rolled brass i.e sheet.

                                      When I used to modify lamp fittings for someone in the dim distant past I used CZ131 which I could buy as round bar.

                                      Keith

                                      #315717
                                      Michael Gilligan
                                      Participant
                                        @michaelgilligan61133
                                        Posted by SillyOldDuffer on 07/09/2017 10:40:49:

                                        Michael, I read Laurie Penman's article and intend trying his approach too. (How on earth did you find the article? Talk about buried treasure, you must be the Indiana Jones of web research.) I'm not sure about using the end of a drill chuck directly as a swage and will probably turn something to protect the chuck. I know chuck jaws are hardened but even so. Perhaps horologists use a particularly ductile brass for that sort of work?

                                        .

                                        I have used the 'spinning' technique on small work, Dave; using a single ball-ended hand-tool, but remembered having read "somewhere" about Laurie Penman's idea … surprisingly; if you know that something is out there, it's usually possible to find the right words [deep in the subconcious?] to successfully search for it.

                                        I would be wary of using my good chuck for such work, but have several small Jacobs drill-chucks [bought very cheaply] tucked away for future abuse.

                                        MichaelG.

                                        #315723
                                        Keith Rogers 2
                                        Participant
                                          @keithrogers2

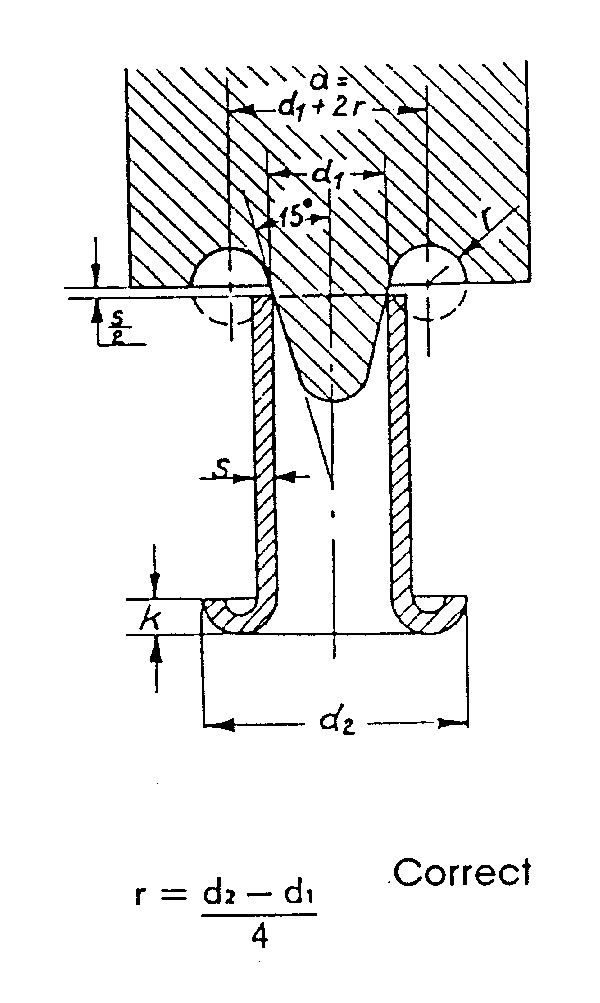
                                          Attached pic of drawing supplied to me by a tubular rivet manufacturer giving correct proportions for a swaging tool.

                                          I have made several of these in the past from silver steel. They need to be hardened, preferably dead hard and with a well polished finish.

                                          For brass rivets up to about 3/16" dia. I used the tool in my drill press running at a slow speed and with lubrication. I have successfully closed a 1/4" dia. tubular steel rivet with a short tool in the bench vise.

                                          rivet tool.jpg

                                          #315728
                                          speelwerk
                                          Participant
                                            @speelwerk

                                            It looks to me the problem is the correct material, even if you anneal the brass normaly used in machining it will crack if you try to deform it that much. Why Mr. Penman makes use of a extra bush for fitting a wheel on to a pinion is me not clear. If everyting is supported and lined up correctly you can force the pinion direct into the wheel. This for small and thin wheels or for larger wheels. An old way to fit wheels onto pinions is to force the brass of the wheel into the pinion teeth, but for that method the modern brass is also to hard. Niko.

                                            Edited By speelwerk on 07/09/2017 14:41:52

                                            #315729
                                            SillyOldDuffer
                                            Moderator
                                              @sillyoldduffer

                                              More disappointments. I get fairly close before the cookie crumbles, which is frustrating. Never mind, I'm learning lots of new tricks.

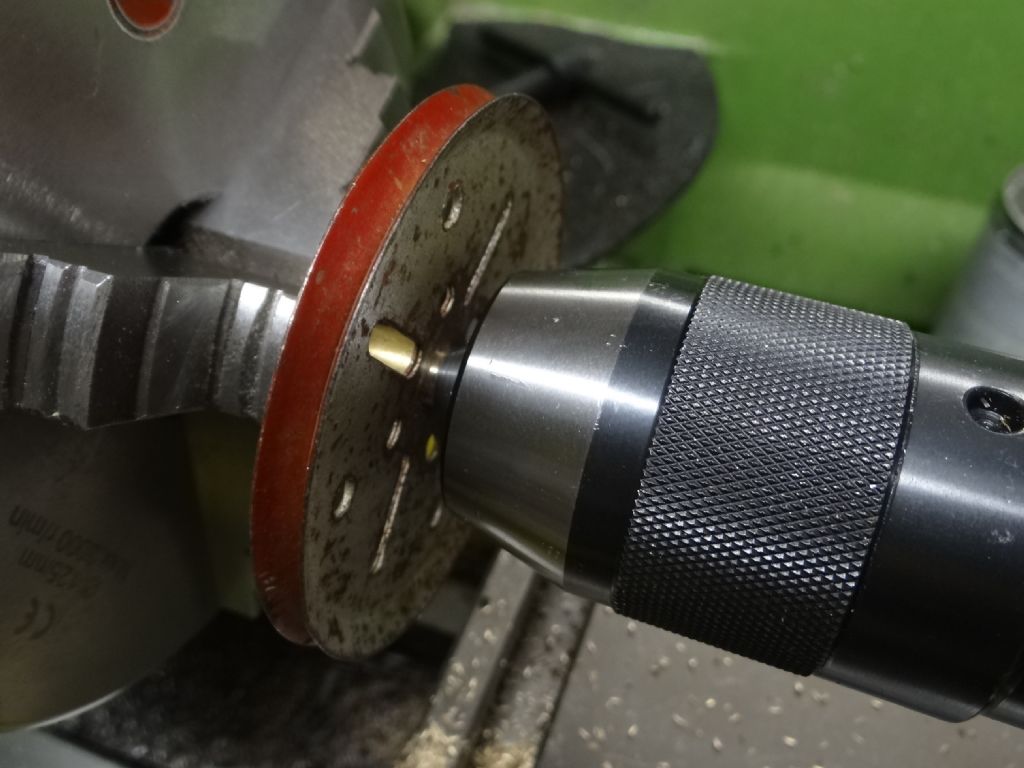
                                              Here's the lathe method ready to go:

                                              dsc04567.jpg

                                              I modified the boss so that the swaged section was about 0.4mm thick. Without annealing it flattened fairly well as the lathe turned but, just as the edge of the swage pinched the pulley, it disintegrated. The die/punch approach does the same. The brass gets very brittle the more it's pushed.

                                              I made another boss and tried to anneal it.

                                              dsc04568.jpg

                                              Oh dear. I overdid the heat and the thin part crumbled in front of my eyes.

                                              dsc04569.jpg

                                              I'm going to try a few more times with the brass rod I've got. Glad for comments on my annealing technique as it may be faulty. Using a blowlamp:

                                              • Method 1 – brass heated until it goes blue and immediately plunged into cold water.
                                              • Method 2 – brass heated until it glows red and immediately plunged into cold water. (The ruined example went bright orange after I accidentally moved it into the hottest part of the flame. I wish I had steady hands. )

                                              I'll try Michael_w's repeat annealing suggestion later : it's not ideal in this case because the pulley I'm using has been painted.

                                              At the moment I'm pinning my hopes on getting a more ductile brass, so thanks to Clive and Keith for providing the CZ numbers. I feel I'm probably asking too much of the brass I've got. Although it machines well it sure don't like bending!

                                              Dave

                                              #315732
                                              Keith Rogers 2
                                              Participant
                                                @keithrogers2

                                                Hi Dave,

                                                You're right, you are asking too much of the brass you have it's probably wrought brass which seems to hate being deformed. (Been there,done that). You'd be surprised at the difference it makes if you use the right stuff.

                                                And you wont have to anneal it!

                                                Keith

                                                Edited By Keith Rogers 2 on 07/09/2017 15:01:02

                                                #315738
                                                Michael Gilligan
                                                Participant
                                                  @michaelgilligan61133
                                                  Posted by SillyOldDuffer on 07/09/2017 14:39:04:

                                                  Glad for comments on my annealing technique as it may be faulty. Using a blowlamp:

                                                  • Method 1 – brass heated until it goes blue and immediately plunged into cold water.
                                                  • Method 2 – brass heated until it glows red and immediately plunged into cold water. (The ruined example went bright orange after I accidentally moved it into the hottest part of the flame. I wish I had steady hands. )

                                                  .

                                                  I'm never happy trying to heat-treat brass … too much risk of the zinc evaporating, methinks.

                                                  I'm sure you will get there when you get some more ductile material

                                                  … and maybe soften a few sharp corners ?

                                                  MichaelG.

                                                  #315742
                                                  SillyOldDuffer
                                                  Moderator
                                                    @sillyoldduffer

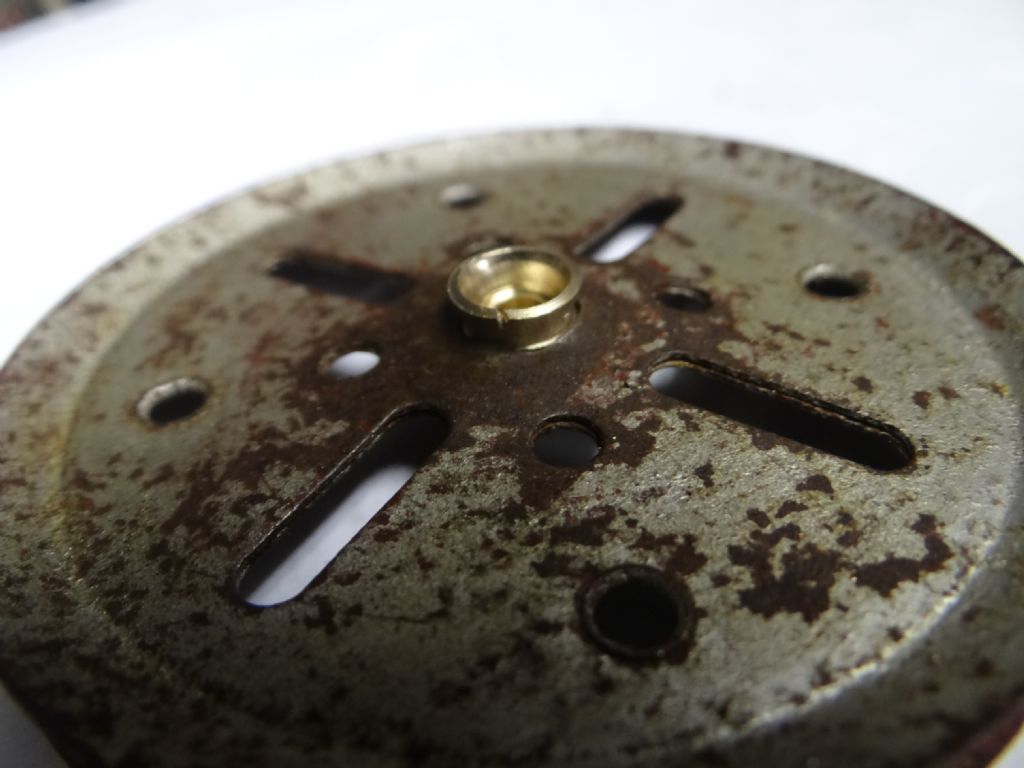
                                                    Success! (Much to my surprise!)

                                                    dsc04573.jpg

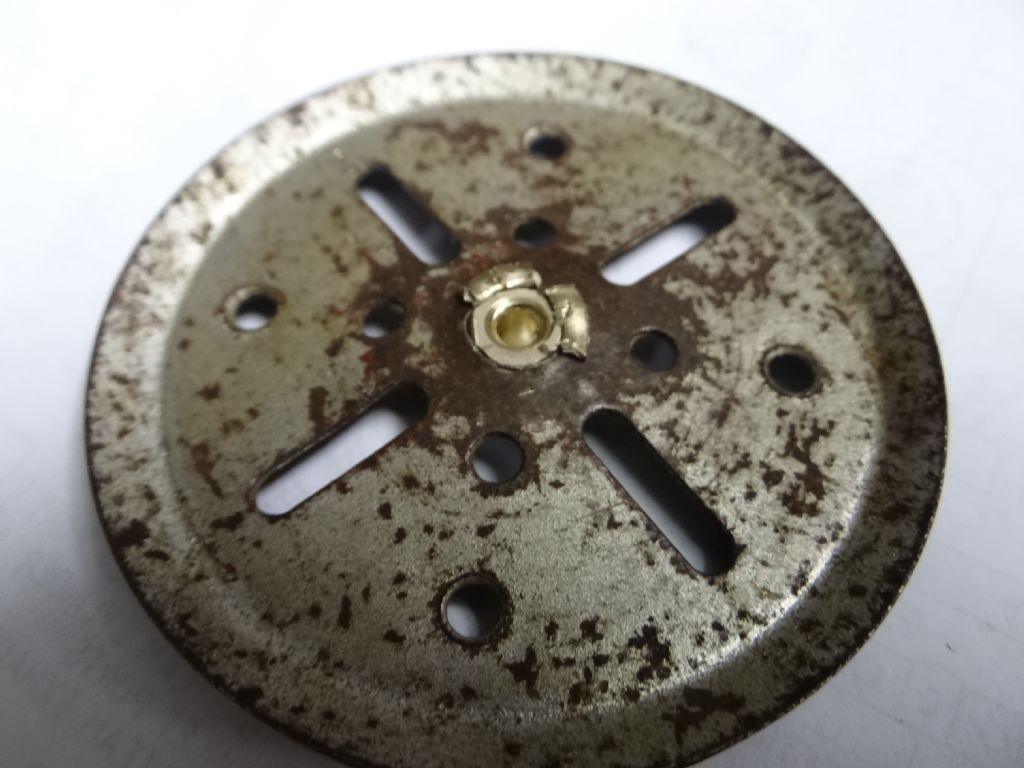
                                                    Despite a few imperfections this boss is a solid fit on the pulley with no splitting. On the downside making it was labour intensive. After countersinking the 4.1mm meccano shaft for 2mm using an 8mm slotting mill, I turned the boss down to 8.4mm over a length of 3mm to fit the pulley tightly. Before attempting the swage, I warmed the end of the boss with a pencil torch until the brass went blue and I quenched it. Then with the pulley spinning at 150rpm in the lathe plus a squirt of cutting fluid I used the tail-stock and the 60° punch to take the fold half way. Then I reheated the swage part of the boss to blue heat and quenched again. Once recovered from breathing burnt pain fumes, I finished the swage off with the flat punch in my vice. The brass folded and gripped the pulley without splitting. (I would have finished in the lathe but the punch I made is too short to fit the chuck. Doh.)

                                                    With a more ductile brass it might be possible to do the squeeze in two steps using a 60° punch and a flat one to finish off. I'd expect the tool shown in Keith's drawing to do an even better job – it starts gently before completely turning the swage over.

                                                    Whilst not a perfected process, I'm happy that this can be done. With a bit more work, a Keith style punch, and the right brass, I think these could be knocked out at speed with just a lathe.

                                                    Many thanks for all the help! You chaps sure know your stuff.

                                                    Dave

                                                    #315744
                                                    Michael Gilligan
                                                    Participant
                                                      @michaelgilligan61133

                                                      Been doing a bit of 'research' on my 'bus journey:

                                                      **LINK**

                                                      http://www.dalefield.com/nzfmm/tips/loosebosses2.html

                                                      MichaelG.

                                                    Viewing 25 posts - 26 through 50 (of 54 total)
                                                    • Please log in to reply to this topic. Registering is free and easy using the links on the menu at the top of this page.

                                                    Advert

                                                    Latest Replies

                                                    Home Forums General Questions Topics

                                                    Viewing 25 topics - 1 through 25 (of 25 total)
                                                    Viewing 25 topics - 1 through 25 (of 25 total)

                                                    View full reply list.

                                                    Advert

                                                    Newsletter Sign-up