Posted by KWIL on 05/10/2015 15:17:32:
The lathe in question is a Hobson H7 which is an oil lubricated gearhead lathe, grease should not be involved.
In addition 2lb in force strikes me as very low.
Boxford did change the bearing types used at some point so the settings might not be appropriate any more. There is some comments on lathes co uk about that. From memory they did use taper rollers that had a lower cone angle and then switched to the standard cone angle ones which are also much cheaper. As far as I know they don't use super precision bearings in the older lathes but still achieve much better run out figures than that. They test to a max error of 0.0004" on the spindle and reports I have seen show 0.0002" measured. Taper on work max of 0.001" per foot, measured 0.0007". Some come out better. The taper can be corrected by straining the bed but that needs a substantial base for the lathe to sit on. Mine shows figures that are much better than this so I'd guess that the bearings do run in a bit.
I assume that the torque was measured without the spindle driving any gears ?
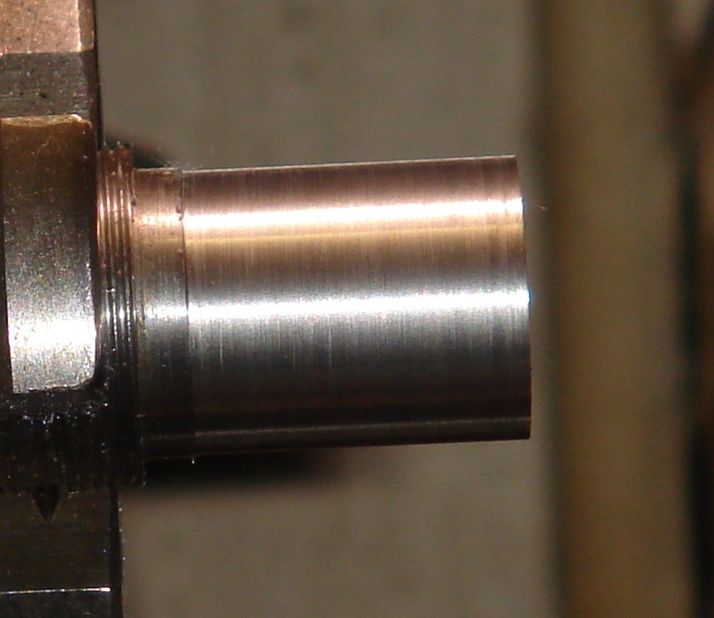
Bearing heat should still be an indication on a gear head lathe really. There will be some friction when they are running correctly. My reason for doing this goes back to training. Much bigger lathes but it was pointed out that lathe bearings ( gear heads) run at over 100C. Easily noticeable by touching the head stock around the bearing housing. They get very warm. A number of the machines will have had 2 angular contact or roller bearings fairly close together at the front so more sources of heat in that area. Anyway after going through the exercise of adjusting them I can now tell when the lathe has warmed up. Very very light cuts show marks on the finish which are caused by a wobble on a counter shaft pulley. The repeat pattern it generates can be seen on this

 Only a few micron deep but irritating. The shot is larger than life and the finish feels glass smooth.
Machine the spindle – no way. If needed make new chuck back plates as machining the register on them will have the same effect. In fact they may have already had that done. It is possible to true up morse tapers with a reamer but DO make sure the tail stock one is correct first. That can still be trued up in the same way even if there is a slight error in the spindle. This should only be done after it's been set as accurately as possible via it's adjustments and shimming if needed and is only intended to remove a few thou not correct gross errors. The only sensible way of checking between centre alignment is via turning tests or the use of a test mandrel and dti and even then it's possible to miss interpret the results. Parallel between centre test mandrels don't seem to be available and the ones with a morse taper on the end usually have a hole in the end to take a draw bar, not much use really.
The usual way of truing up a tail stock morse taper is to fit the reamer in the 3 jaw and push the tail stock up against it with the quill part wound out. It can only be done if morse fitting still have some taper sticking out when fitted. This assumes a well fitted 3 jaw chuck.
I think the OP would best do some heavy turning with the machine and then check things again. There are also some simple turning tests that can be done to check the alignment of the spindle to the bed but bed wear can mess these up a bit. Excessive recutting with a tool at the same setting is a good indication of loose bearings. If very bad the same setting will take several noticeable cuts.
One thing most important on lathes – don't jump in. Make sure of what the problems really are before attempting any corrections otherwise things will probably get worse.
John
–
Edited By John W1 on 05/10/2015 17:10:46
Hopper.


 Only a few micron deep but irritating. The shot is larger than life and the finish feels glass smooth.

